Minecraft is great, but mining long shafts - especially initially, with a slow pickaxe - requires holding down a mouse button for way too long. Sure, I could cheat. Or, I could build a mouse that uses foot pedals.
A small mouse
You’d think travel mice would be great for this. And they are, especially because you might have one lying around (often given away as swag) - except for the cord. Instead, I got this small “children’s” mouse (Amazon link) with a proper cord. It was USD $7 (excluding tax).
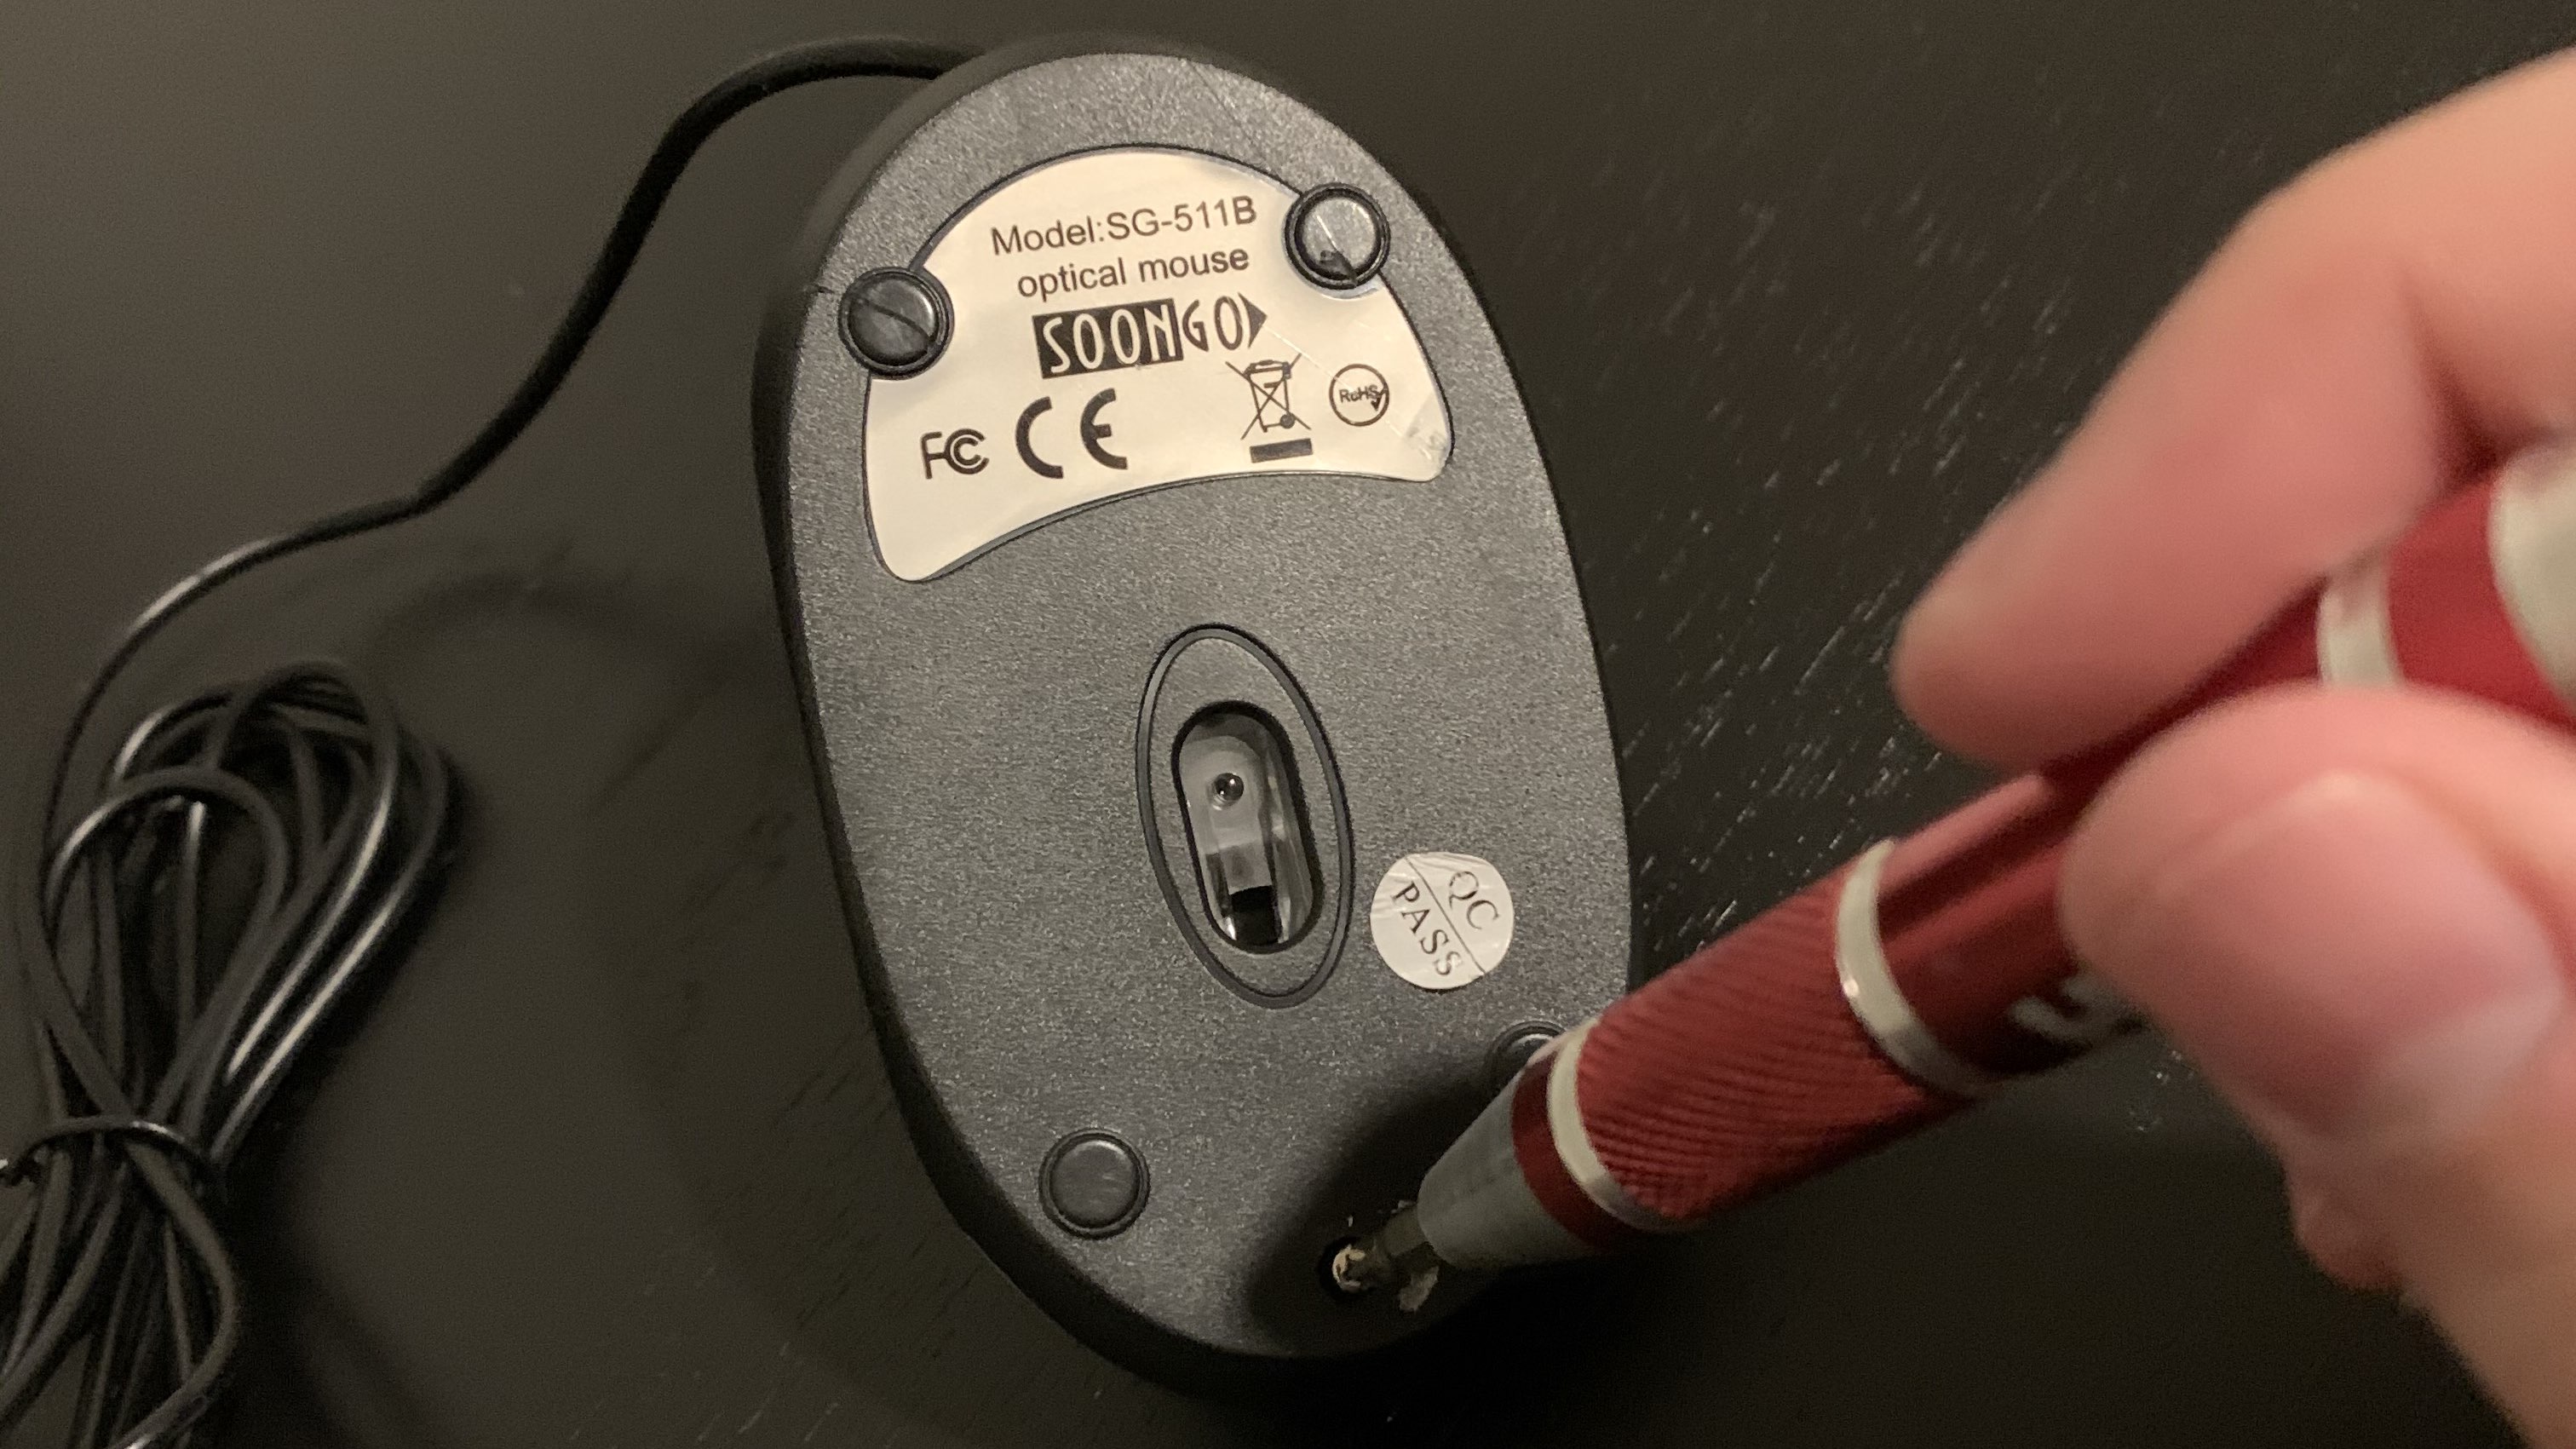
I had a few false starts trying to find the screws. They’re usually under the anti-friction pads, and you can see my rough attempts to lift these. On this mouse, there’s only one screw under a QC sticker:
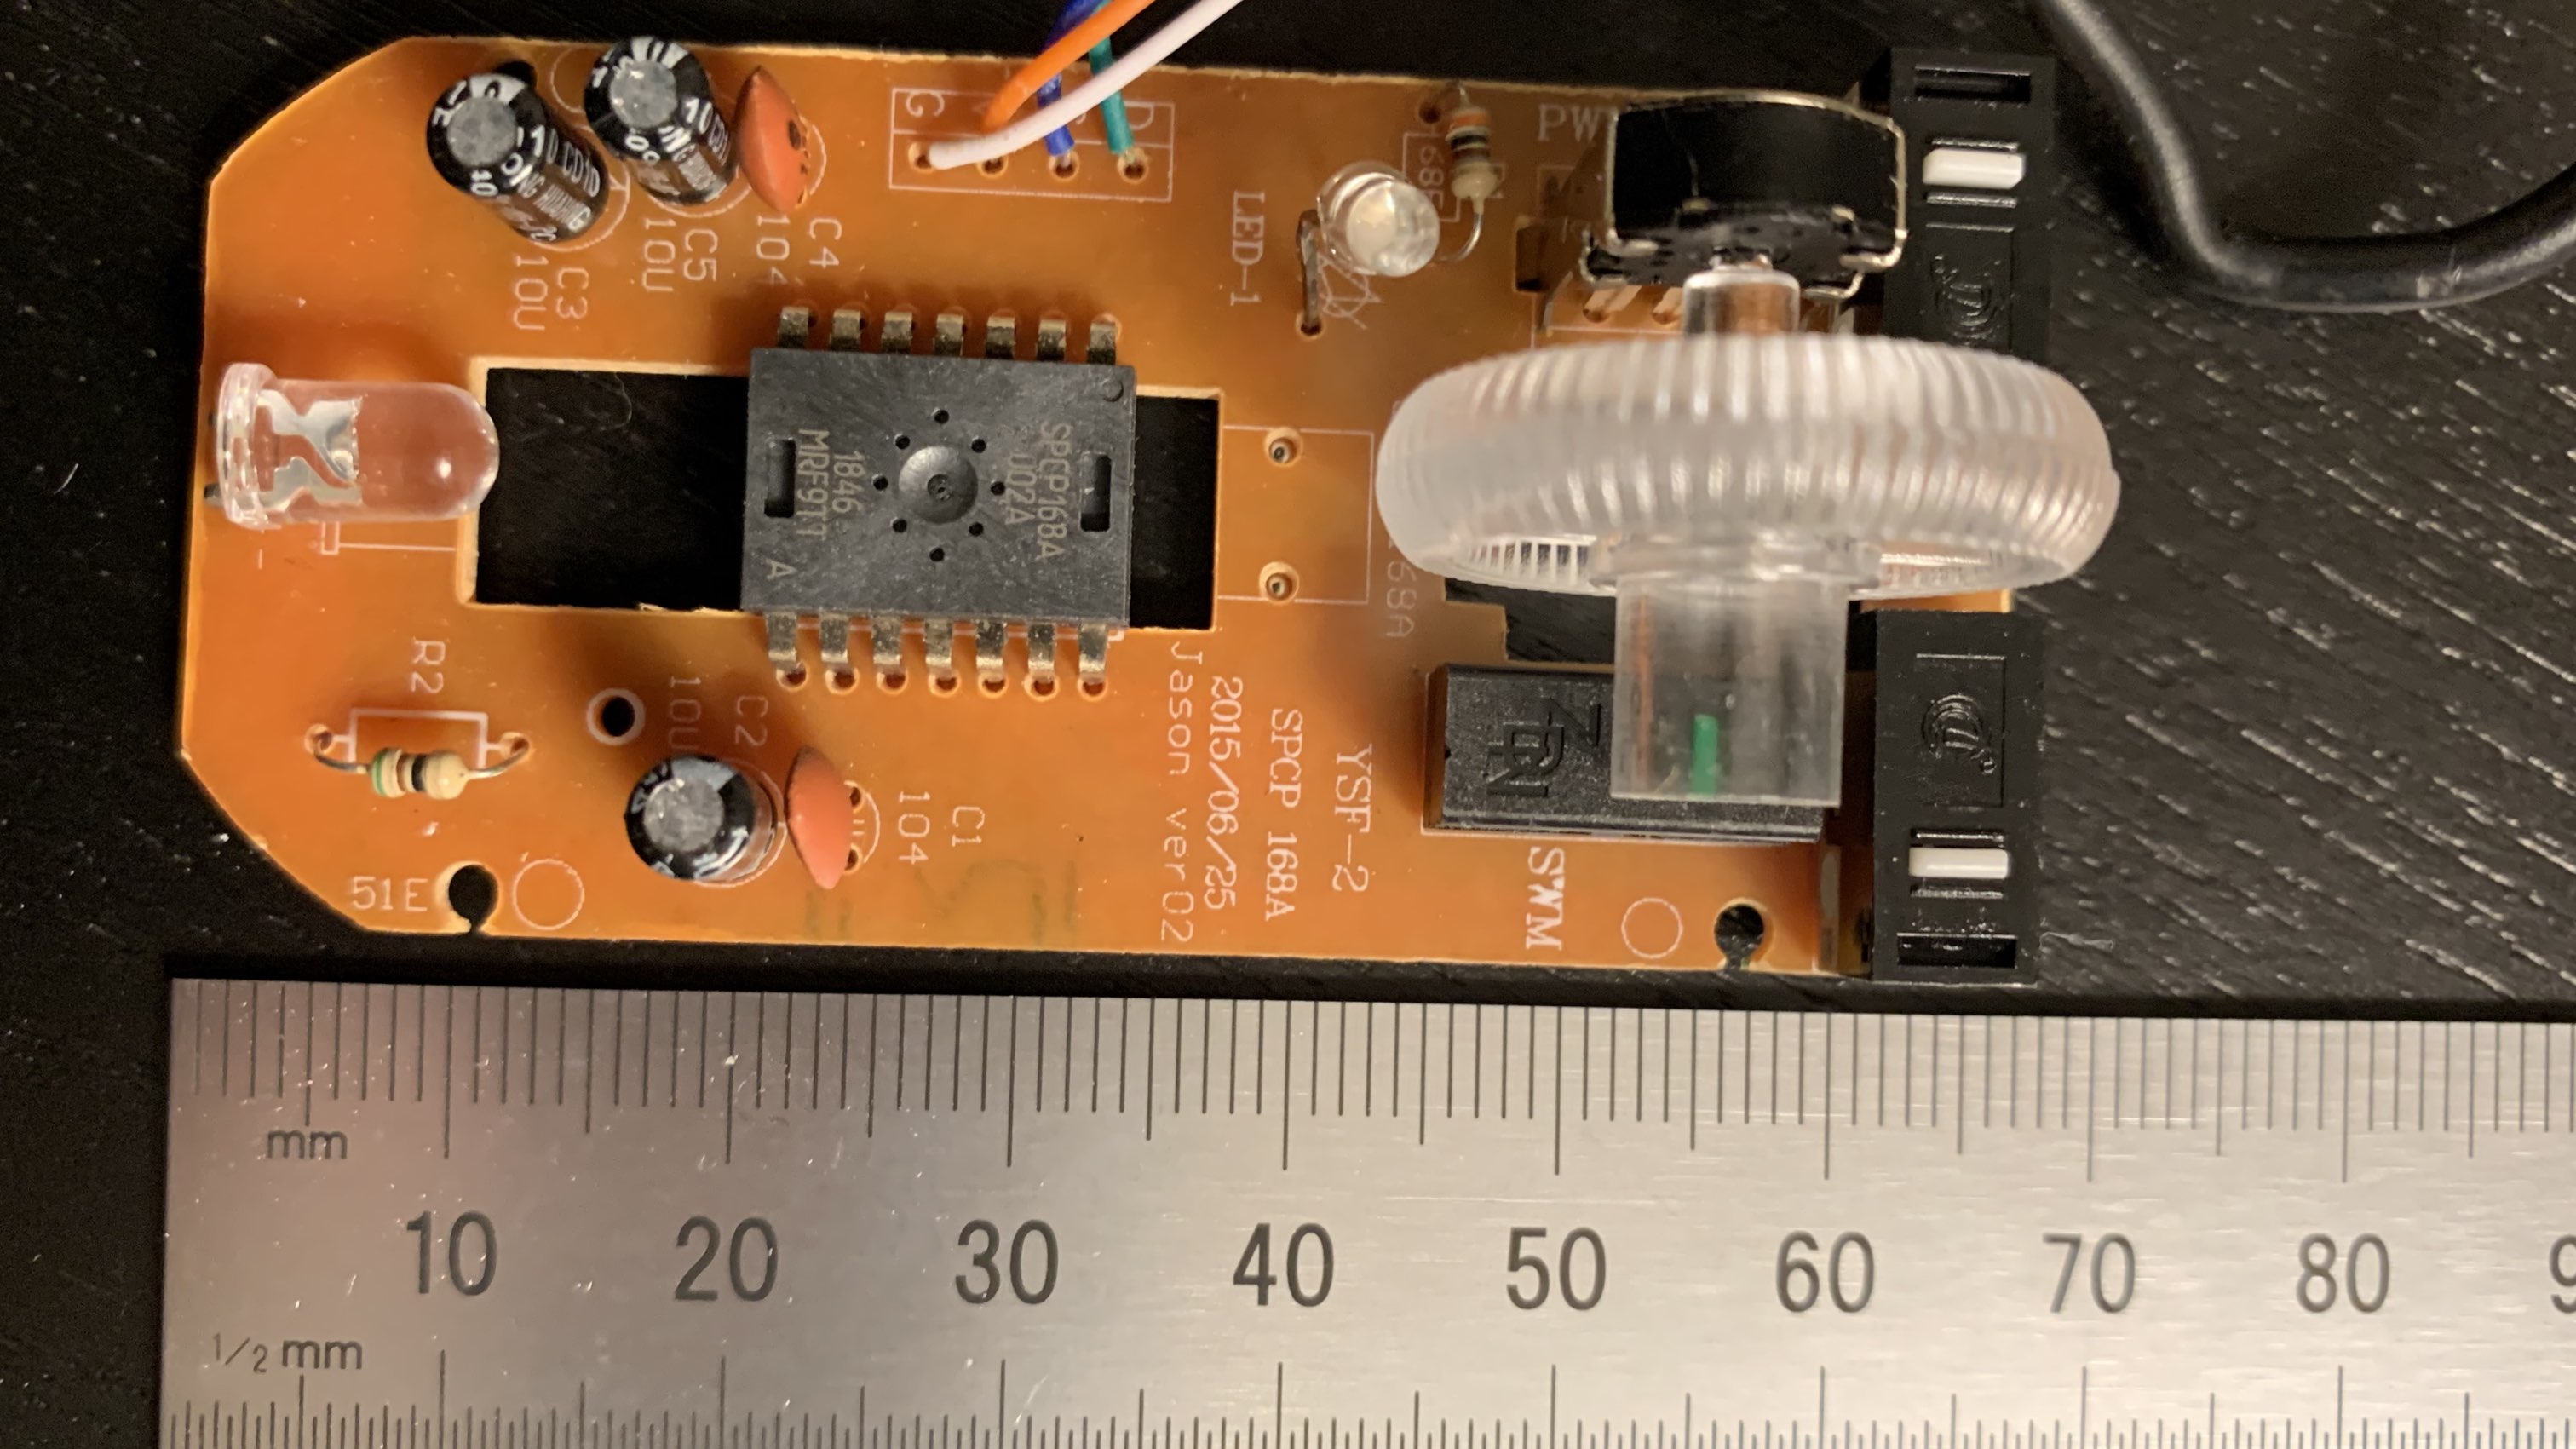
It comes apart very easily, and the micro switches look quite decent. There’s three - left, right, and middle (under the scroll wheel):

The PCB is a lot smaller than the body, which is good. It’s just under 7cm x 3cm, and just 1.5cm high once the scroll wheel is removed:
Foot pedal, jack, and project box
There are many foot pedals for music keyboards and digital pianos. There’s two general styles: a spring-loaded flat box, and a more traditional pedal. For the flat box, I got this cheap sustain pedal (Amazon link). It cost USD $11 USD (excluding tax). I already have an M Audio SP 2 (Amazon link) for my digital piano. It feels much sturdier (it’s heavier) and the travel is nicer. At USD $19 (excluding tax), it’s a steal and well worth the upgrade.
As far as I know, all pedals use a 6.35mm (1/4 inch) mono phone/headphone jack. So, you’ll also need matching jacks. I got 6 cheap mono jacks (Amazon links) for USD $12. There are nicer, sturdier jacks, but this won’t see that many unplug cycles. You can get these in a few places, so shop around. (Not shown are the mounting washers and flat hex nuts for the jacks.)
I guess you could do without the jacks, and solder the pedal directly to the mouse PCB, but that makes storage difficult. Swapping pedals around is a nice feature. For Minecraft, I mainly want the left mouse button, but you never know in future.
Finally, a project box makes any project look much neater, and adds ruggedness. Mine was 80 x 50 x 26 mm, but it was a pretty tight fit. I’d recommend something taller if you can get it. If you’re interested, mine were also from Amazon and pretty decent.

Build time
Overall, this build took less than two hours. I got a bit carried away, and didn’t take many pictures. Desoldering the micro switches was very easy. I attached 7cm wires to the PCB and jacks. This was a bit too long for the nearest jack and almost too short for the furthest jack. A bit more planning here would help. I tested all of the jacks before proceeding.
I put tape over the optical sensor, so if the PCB jiggles around, the cursor won’t move.
The fit was quite tight:
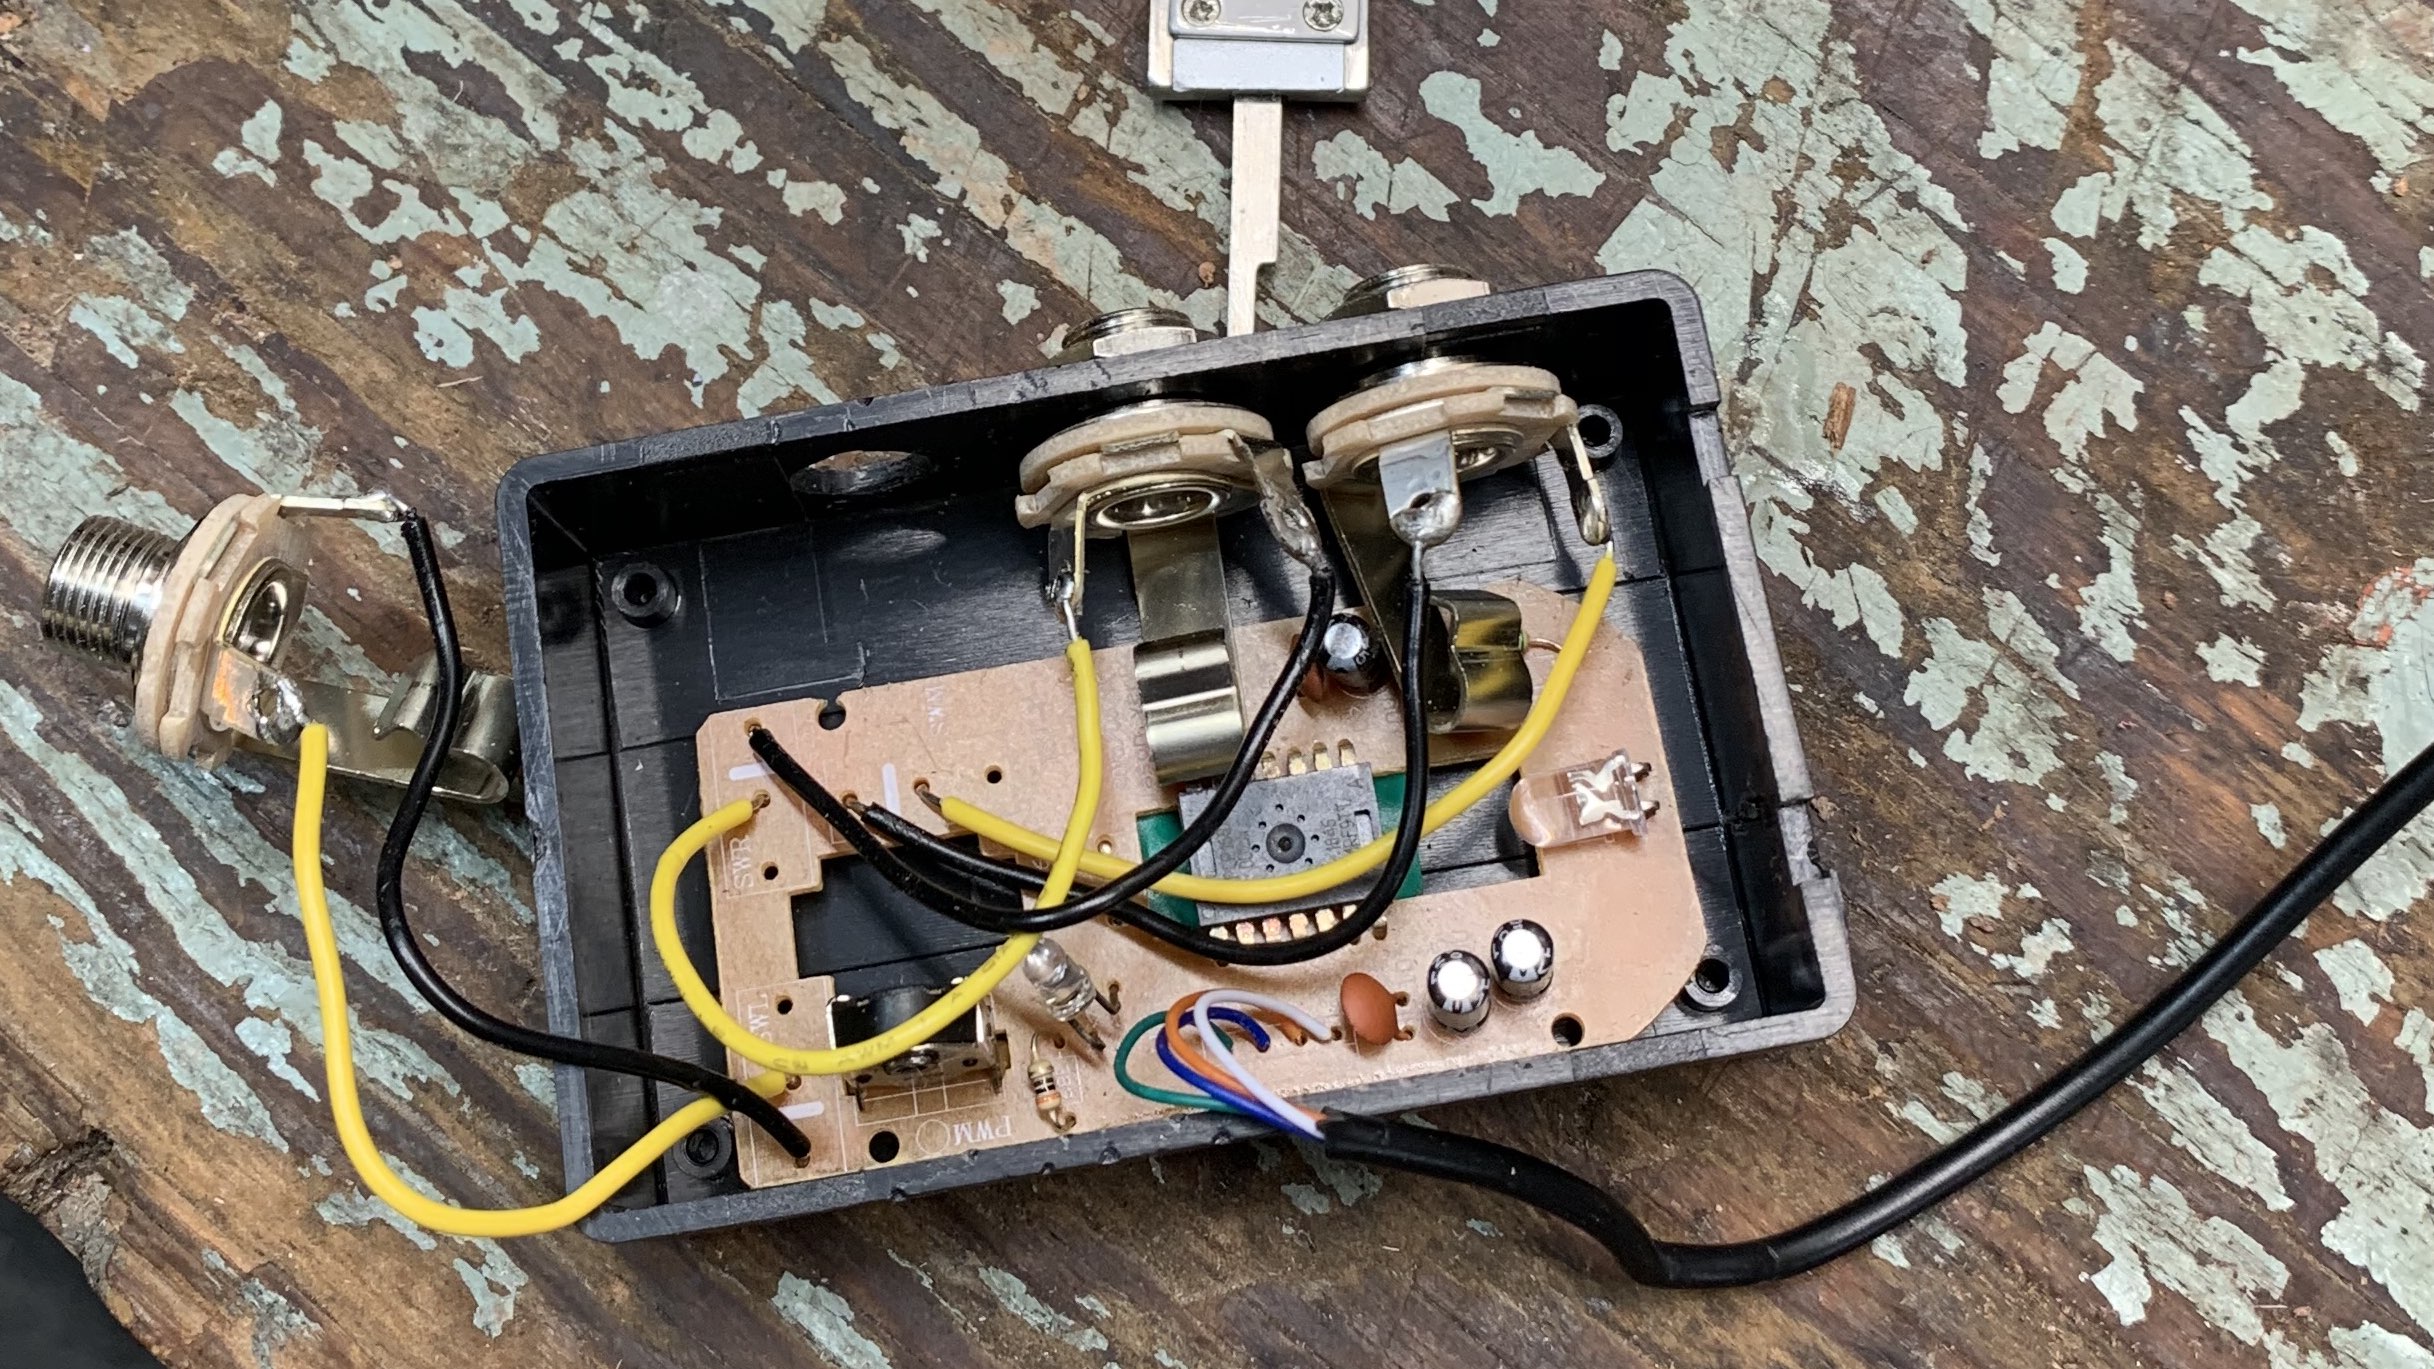
The holes needed to be bigger than 6.35mm. I slowly drilled the holes out, and went bigger until it fit. The fit isn’t too important here, as they come with a washer and flat hex nut. In the picture, the long tabs on the jack are down towards the PCB. I decided to flip these to the top, as they flex up when the plug is inserted. As I said, it was a tight fit. I cut a notch for the USB cable, and tied a knot in it to provide strain relief. The wires attaching it to the PCB look pretty flimsy.
With a label, it looks almost professional:
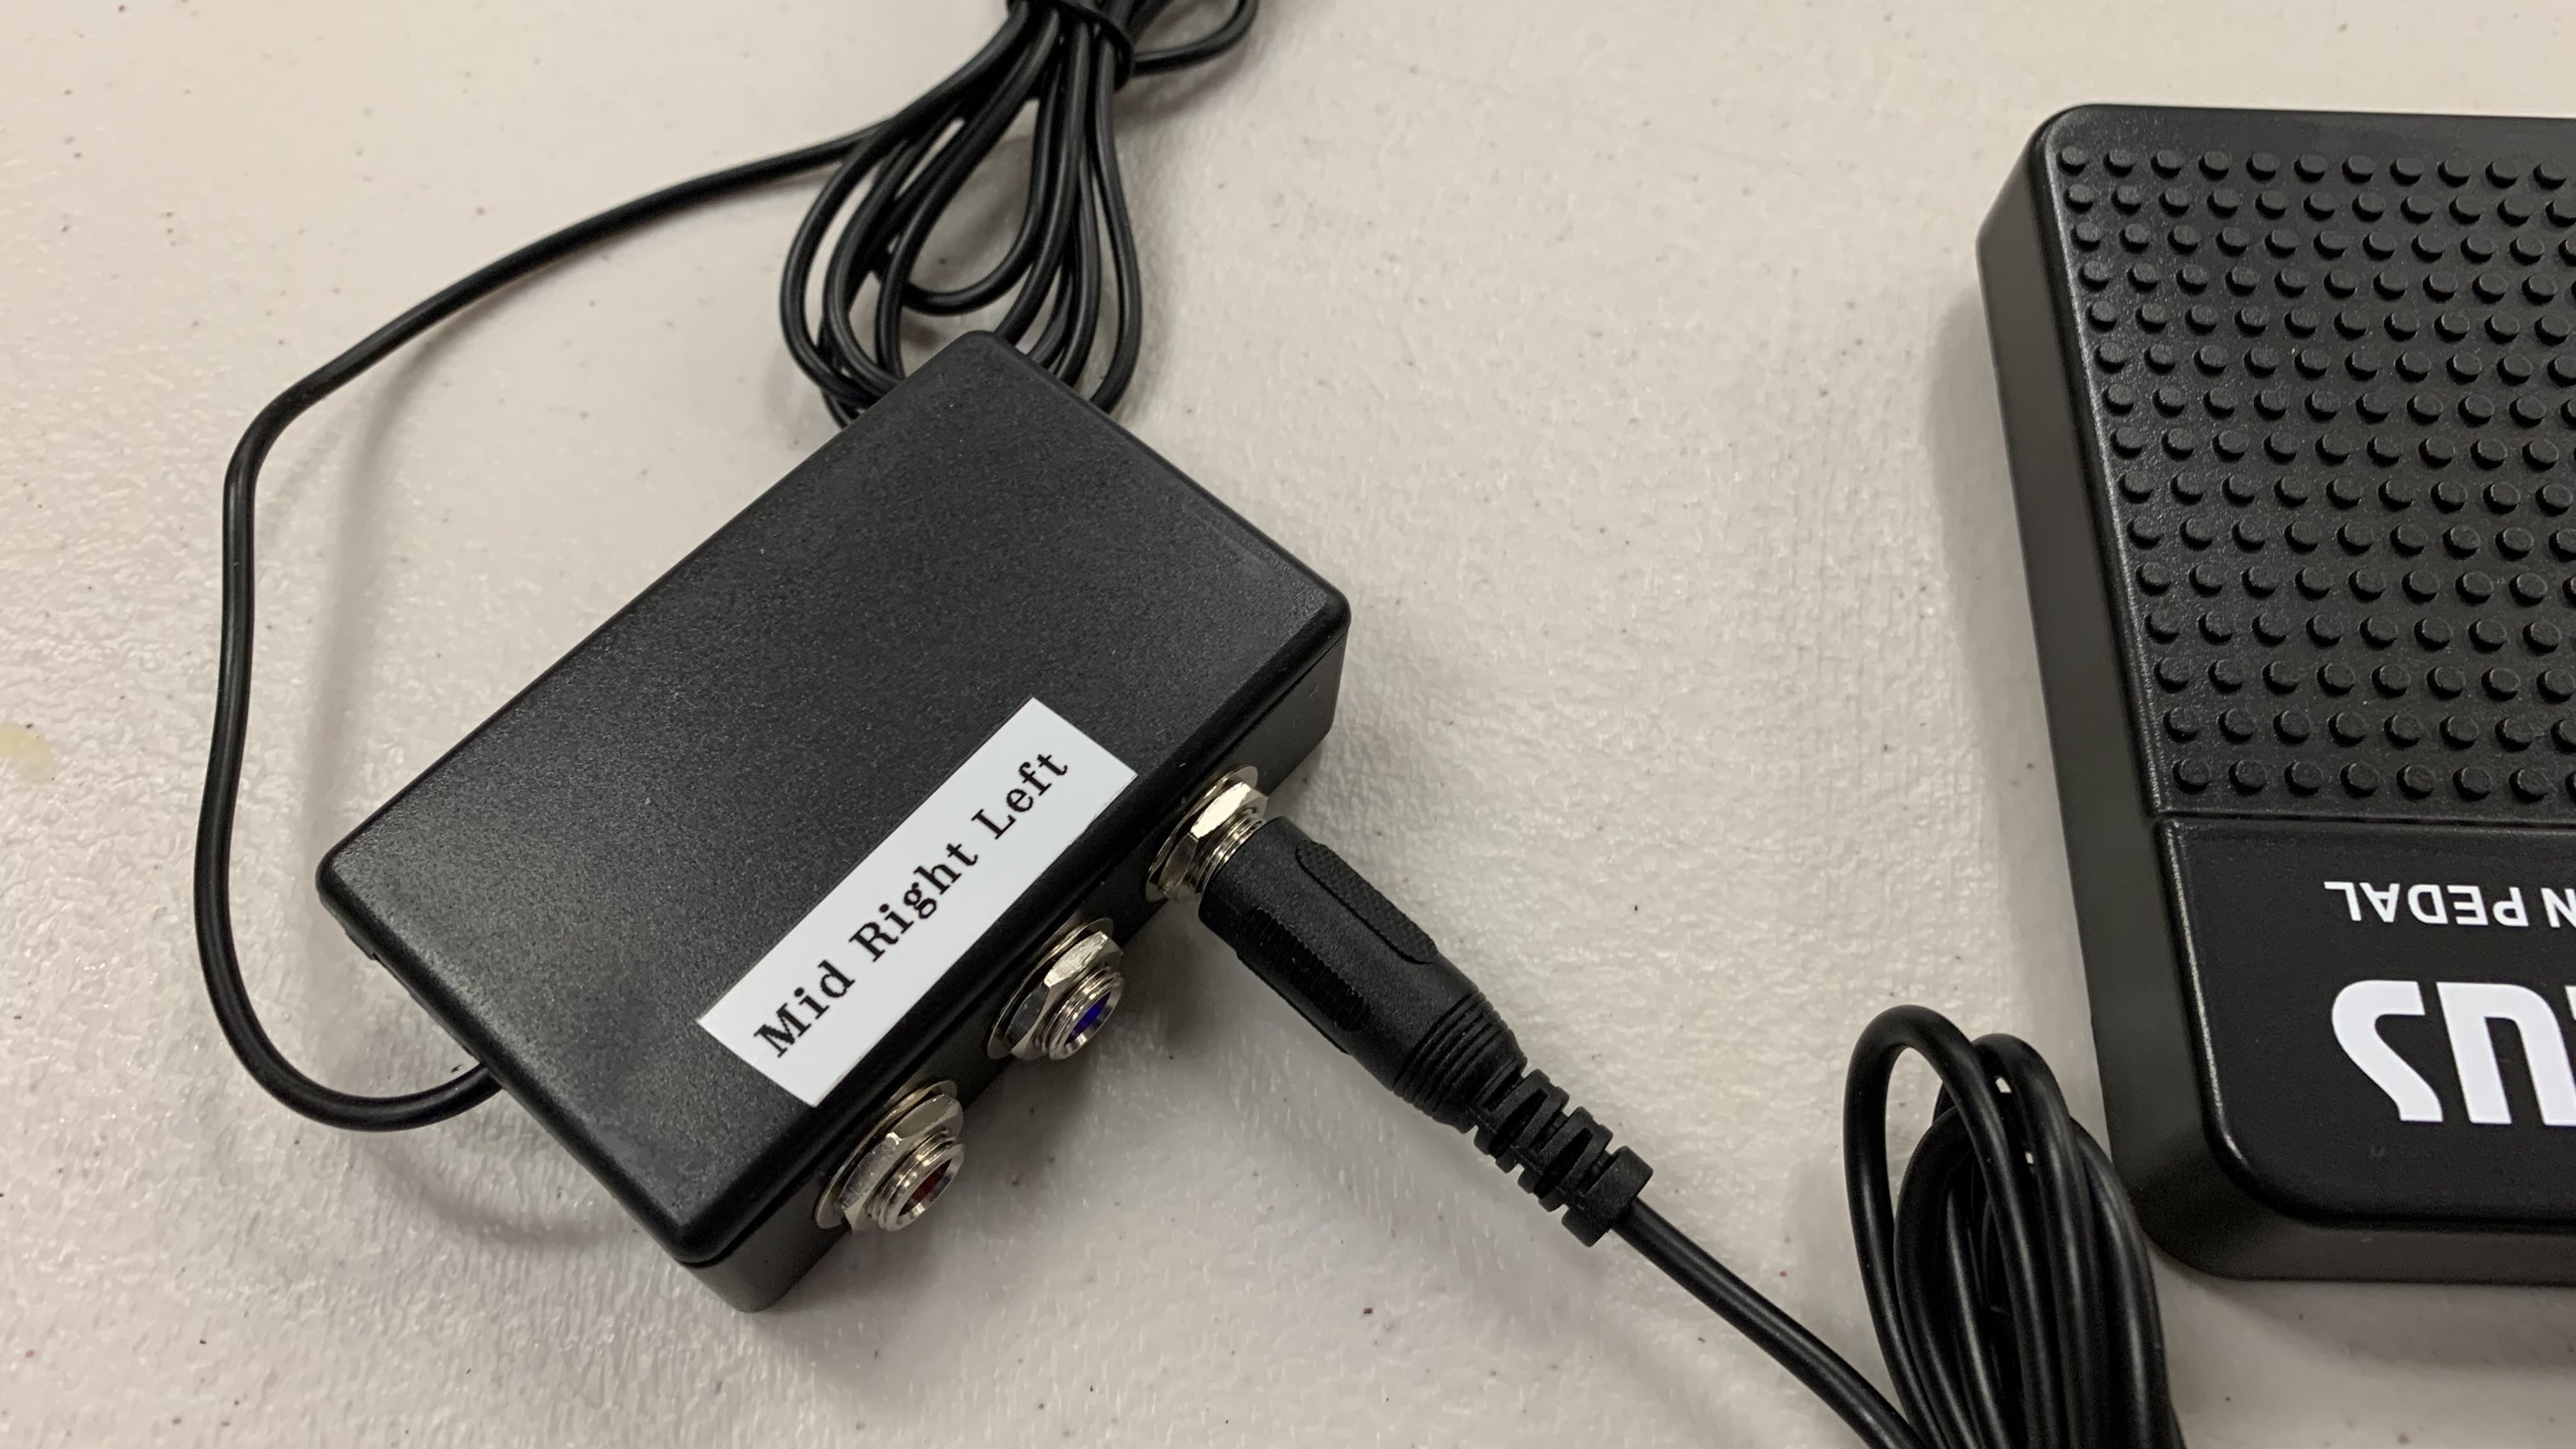
So does it work? Yes, it works great, although I prefer the M Audio pedal. But the longer USB cable than a travel mouse would have is a boon. Job done!
